Showing posts with label style. Show all posts

Handmade Era

This is something I've been thinking about doing for over a year now, and I finally just did it.
I started a new Tumblr blog revolving around all things handmade up for sale. I come across so much cool stuff all the time on Etsy, Storenvy, Society6, as well as Tumblr, and I wanted to put it all together onto one blog with source links to the shops they come from.
It's split up into two categories - shop & get inspired. Aside from items up for sale, I want to add inspiration photos to encourage DIY projects.

It only felt appropriate to call it Handmade Era.

I searched high and low for the perfect Tumblr theme filling it with so much content the past few days. If you're interested, follow the blog at http://handmadeera.tumblr.com!

Color Block // Surf The Mermaid Wave

Lately I've had a lot on my mind such as packing of course. There was so much I wanted to get done before the packing officially went into effect, but it turns out things didn't work my way so well. I've been working too much. So the next month or two maybe a little bit of a ghost town until I get comfortable in my new environment. I have to say though, I have quite a list of projects I can't wait to start and post about!

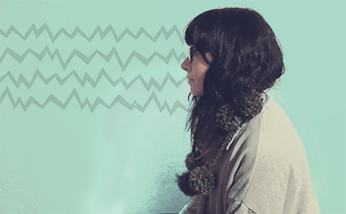
In the meantime, I've been all about color blocks lately. And I have been all about sea foam green.
The past year I found that I developed this infatuation with the ocean and sea life. I'm not a big beach person, and sometimes sea creatures freak me out, but theres something about sea life and metaphors of everything sea related that really connects with me. The vintage deep sea diver, vintage bathing suits, the colors of the sea including coral and the creatures - it's all just so fascinating. I love music that also resonates sea things. I find that Interpol and Gorillaz do such a great job at grabbing my attention with their sea metaphors and dark beachy sounds, as well as The Raveonettes with their cool shoegaze surf rock-ness.

With that being said, I was excited to put together this seafoam color block post, gathering a nice mix of fashion, music, and literature.
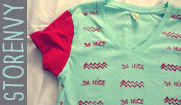
It started when I found these seafoam green shirts at work. For a while I questioned what to do with the shirts, and then inspiration hit me.

I found this water photo on Tumblr (Note: this photo isn't mine, I just have no idea who to credit!). It kinda sparked something in me, in which I browsed through my fabric scraps and pulled out a bunch of greenish colors. I arranged them to create a cool ombre effect.

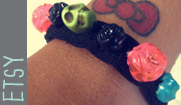
The seafoam crave continued after I bought this Mermaid book and found an OPI nail polish matches my book exactly (OPI My Dogsled Is A Hybrid). These two aren't exactly of the seafoam green nature, but the colors are sorta close and it fit this sea theme very well.

Aside from those, the new Raveonettes limited edition vinyl is super cool. I posted about it once before here.
About these shirts though, I plan on doing more like this with different colors too. Its a simple gradient shirt that looks real cool.

Crafted // Line Work

I didn't realize how long it's been since my last post. Life has been a little hectic between full time work and preparing for Kawaiiland. I was able to find some time to sneak in a little project for myself in which I'd like to share.

Back in April I shared these shoes in a wishlist post. I think the design of these YES shoes is fab: the contrast of the two colors and it's just so simple. I wanted to experiment with line work similar to that.

I went shopping the other day (for the first time in MONTHS) and found this oversized pink shirt. I've been into larger shirts lately; baggy shirts makes me feel most comfortable in the summer. Whether I would have decorated it or not, I would have bought this shirt anyway. But as soon as I saw it, I thought of adding the line design to it.

I contemplated if I wanted to use a brush or use the paint straight out of the tube. I ended up using the tube. The lines are a little dense but it doesn't bother me.

I began experimenting with the lines and eventually got a nice flow. I didn't want to take over the entire shirt so I made some areas more spaced out than other spots.

I just kept going until it felt right. I drew some triangles and 'x's like on the shoes.
This will surely fix my craving until I cave and buy these shoes. I'm really liking how it came out, I'm contemplating making more of different color ways, and may even make some for the Kawaiiland event. I'll see how much free time I have!

Crafted // Two Tone Cotton Jersey

Earlier this month, I posted about the patterned fabric I designed and purchased from Spoonflower. I printed one yard each, basically as a sample to see how they'd come out. I obviously don't want them to sit around, and so therefore I tried to think of ways of utilizing them.

So when my coworker asked me to make him jerseys, he gave me a bag filled with fabric and tank tops & jerseys to imitate.
I've noticed my interest shifting towards more sportswear styled clothing causing me to make more sportsy clothes. Aside from working at a company that works with clients that design sportswear clothing, I've been pretty inspired by britpop lately (which explains my recent Damon Albarn obsession, yep!). 90s era was sporty, style-wise. At least British-wear seemed to be. It feels like everything around me lately has been pretty sporty. So I wanted to created something jersey-like.

I like the cut and style of this jersey. I decided on picking one of my fabrics and a solid color to mix it with. I've been all about aqua and red lately, so I went with that combination with one of my patterns.

I traced the larger section along with a tshirt that fits me well, but followed the basic shapes.

What I found most difficult was the collar. I didn't have a proper ribbed neckline, but I found the perfect ribbed red tshirt in which I used to make the collar.

Aside from the trouble maker collar, this shirt was actually pretty easy to construct after figuring how everything is cut and aligned.

I really like how this jersey came out. I have a lot more of this fabric so I figured this would be my sample. I don't know how this printed fabric washes, so I made this shirt for myself to figure out everything. If I feel it's a go, I may make more and add them to my Storenvy shop!
I feel so excited!

Crafted // Lips Shirt

The other day, I shared a post about screenprinting at home. I made my own little screen out of an embroidery hoop, synthetic woven material, and Mod Podge.
I made a shirt full of lips.

I got this design idea from a dress Tavi Gevinson wore. I have a bit of a fascination/obsession with Tavi and everything she does. At such a young age she's accomplished so much changing the lives of so many girls, and she does it with such a cool sense of style.
I just really wanted to recreate this.

I found a light colored t-shirt and laid it out on top of newspaper. A neat and clean workspace is important! As well as putting newspaper inside the shirt so the paint doesn't seep through to the back.

I used my screen to paint the red lips on the whole shirt using red screenprinting Speedball paint.

Afterwards I simply made the lines of the mouth with a small paintbrush and black Speedball screenprinting paint. I did a little bit of shading, but mostly kept it simple. I wanted each mouth to look different and unique.

I kept going, painted the lips throughout the entire shirt: the front, back, and sleeves.
Does take a little bit of time to paint along the whole shirt because the painted bits have to lay flat and dry. But it makes for a cool shirt indeed.

Simple Sleeve Alteration

Do you get bored with plain ole' t-shirts? Story of my life. To spice up my wardrobe, the first place I go to are my sleeves. Most of my shirts have designs on the front or back leaving my sleeves to be the only option to be changed. But who doesn't like fun sleeves anyway?

My coworker printed this shirt at work for me using his design. I brought it home with the intention of changing the sleeves. All white t-shirts are usually not my favorite.

I found the fabric I wanted to use. I took off the sleeves with my seam ripper, laid the sleeves down, pinned them to the fabric, and basically cut along the edges to make them exactly the same.

I pinned the patterned fabric to the shirt to replace the old sleeves and sewed it together.

Afterwards I flipped the exposed edges over and sewed it so the sleeves won't fray.

Viola. A super simple idea to fix up simple plain t-shirts. I love working with patterned fabric to make my wardrobe fun. You should too!

// No Comment //

I think I've mentioned at least once before that I'm interning at a screen printing shop in NYC? Well if not, now you know. It really is the coolest and most laid back place to be. Well, sometime, as in most of the time, it gets pretty hectic because the office is so small, there's only four of us that work there, and the phone is always ringing along with people constantly walking in and out looking to place orders. But really though, it's the best thing I can ask for right now.
It's a pretty hoppin' place, and we've printed for so many people, including celebrities as well! But we've never actually seen the celebrities; they send their personal assistants. And here is an example.

Last night we had Lindsay Lohan's assistant come in looking to print this shirt for her. (I took care of this order because there were only two of us working last night. If you see her wearing this, yes it was me that printed it! )

Apparently her credit cards declined a few days ago while shopping and news stations felt it was necessary to share the story. I didn't realize that it was so news worthy. Guess it must of been a slow day.
Anyway, she plans on pulling a Tonya Harding and wear a 'NO COMMENT' shirt for her next NYC outing.

It's been the new trend in celebrity land from what her assistant shared with us. Lena Dunham sported it, and it's a thing that's being sold in some Etsy stores.
It's always interesting to see the trends come and go for celebrities. But hey, this beats all other stupid phrased t-shirts that people wear. I wouldn't be opposed to wearing this. I think it says a lot about how I feel all the time, and I get it!

Flashback Friday // 016

Is it bad that it doesn't even phase me that it's Valentine's Day? I'm neither for nor against it. It's just another day for me that will be treated as a normal day. And so therefore I will do a Flashback Friday post!

Over the summer, I became interested in two toned t-shirts. Or multi toned in this case? I love solid colored shirts with the front consisting of a multi colored pattern. I played around with the idea when I found these Hawaiian like shorts in a drawer of mine. I took it apart and matched it with this dragon shirt I used to wear all the time in middle school. (I'm secretly obsessed with dragons and tribal art. And now it's not a secret anymore.)

When I took the shorts apart, I realized that there wasn't a big enough piece to make up the front of the shirt. So I kind of pieced together strips of the fabric until it made up the front of the shirt. I've never treated fabric like a puzzle before, but that action opened a new world for me where literally no piece of fabric will ever be wasted. (After this shirt, I made a few more using the 'puzzle' method to piece together fabric. I'll save those for another post. )

I sewed the constructed floral patter to the solid green backing and sleeves, and sewed a collar to cover the hemming. It was actually super easy to make after sewing up the patterned pieces.
And yes, I did keep a dragon graphic for the back of the shirt.

DIY // Denim Dress Up

As the semester is coming to an end, I'll finally get around to posting all things I've been meaning to post for a while. Here is one.

///

I bought this denim jacket in early fall. Everyone has had a denim jacket or two in their lives - it really is a style that never dies. When it does die, it always comes back; we can't escape the jean jacket.

There are so many ways to style a jacket to make it your own: studs, rhinestones, patches, graphics, and the list goes on and on.
I wanted to decorate the back of my new jacket. I didn't know what I wanted to do, so I just grabbed a bunch of fabric with all intentions of winging it.

All of a sudden, inspiration hit. I found the fabric I needed, and went along my merry way.

I started sewing minty green patches of fabric on the back to fill up the space as the background. There were two different minty greens, similar in hue, but I didn't care. I liked that random feeling.

I wanted to make somewhat of a 'Japanese rising sun', so I used red fabric with a floral print. I used thin strips of the same fabric for the rays.

To finish up and make it look somewhat complete, I sewed a lace strip on one side. It needed some kind of awkward but a working balance.

And there we go. A fun spiced up denim jacket. If yours is naked, dress it up! Make it fun; make it your own. Do it up.

Grime Green

I've dyed my hair all sorts of colors. Any color, you name it; been there, done that.
I've never done green up until December. Around that time, I was on a big time Grimes high and I fell in love with her green hair.

The thing I love about her green hair is the fact that it was not a bright bright green but more like a darker forest green kind of shade. I love that it has a subtle quality to it and I really wanted that. I settled on keeping the top of my hair black with green tips.

I hate using bleach. It's damaging and frustrating. While on that Grimes high, I was also on a natural high, especially when it came to hair care. I tried to use natural ways of lightening my hair. Unfortunately natural methods aren't as fast as bleach is, but it's more gentle on your hair and lightens to a more natural blonde than a yellow that bleach creates.

I made a peroxide-baking soda-honey mixture to start off. I know it probably wasn't good for my hair but I used that mixture every day for a week. It did lighten, but it didn't get too light. I afterwards used straight honey on my hair. Honey is a natural lightener and conditions your hair at the same time. I personally prefer the honey treatment than the peroxide mix. My hair still didn't reach the lightness I wanted, so I gave into the bleach. I bought Green Envy from Manic Panic, and applied it to my lightened tips.

Being that my hair wasn't super light, I was able to achieve the dark green I wanted in the first place. I really like how it came out but there were a few difficulties I have to overcome to reach the green I wanted.

I didn't keep the green for very long. Well, actually a few months which is pretty damn long, at least for me it is. I dyed my hair black afterwards, but my goal is to get the green back. I'm slowly lightening it with honey again. And my goal is to have more of my hair light enough to get the green I want on more surface area. So, consider this a part one green hair post!

Here's a video of Grimes playing Oblivion with her awesome green hair.

Parallel Lines

I love Debbie Harry. Her music, her style; everything about her is perfect. Who doesn't want to be like her? She's quite the inspiration.

About a year ago, I bought this somewhat of a coffee table book with all photos of Debbie Harry and Blondie; all photos were taken by Mick Rock throughout Blondie's career. All sides of Debbie are shown in this book: her glamorous side, her punk rock side, and her humble side.

After browsing the book, I couldn't help but want to be her. There was one shirt that caught me attention that I love. This striped shirt.

My crafty cravings stirred and I wanted to create something like it. I remembered I had this one long striped shirt. I took it up, shortened the sleeves, and found a subtle grey patterned fabric to sew across the shirt.

I created my version of the cool striped shirt Debbie has once sported.
I'd like to think I'm one step closer to being as cool as Debbie Harry, hah!